08-局内场景与物理模拟基础
1 局内场景的搭建
首先来到GameScene中,删除之前用于测试的代码。
引入要用到的资源便来给你
extern IMAGE img_sky;
extern IMAGE img_hills;
extern IMAGE img_platform_large;
extern IMAGE img_platform_small;
先声明两个POINT变量
POINT pos_img_sky = {0};    //天空背景图位置
POINT pos_img_hills = {0};  //山脉背景图位置
之后设置它们的位置,由于素材图片比窗口更大(防止摄像机抖动时出现黑边),我们让它们居中显示。
void on_enter() {
    pos_img_sky.x = (getwidth() - img_sky.getwidth()) / 2;
    pos_img_sky.y = (getheight() - img_sky.getheight()) / 2;

    pos_img_hills.x = (getwidth() - img_hills.getwidth()) / 2;
    pos_img_hills.y = (getheight() - img_hills.getheight()) / 2;
}
2 物理引擎的实现
2.1 Platform类
要实现重力相关的内容,我们要从两方面入手:分别是下坠的过程以及落到地面上停止。
而“地面”是一个比较抽象的概念,所以玩家可以站立的东西都可以称为“地面”。
所以我们新建Platform类
class Platform
{
public:
    Platform() = default;
    ~Platform() = default;
};
我们要用什么形状来拟合地面的外形呢?
一般情况下在横版游戏中,地面是单向的,即只能阻碍从上到下的运动。所以,剧性的碰撞箱没有太大必要。最终我们选择把地面的形状抽象为一条线
public:
    struct CollisionShape
    {
        float y;
        float left, right;
    };
public:
    CollisionShape shape;
另外,我们需要提供平台自身的绘图逻辑
#include "util.h"
#include "camera.h"
...
void on_draw(const Camera& camera) const
{

}
为了给渲染提供信息,我们需要定义图片指针和位置变量
IMAGE *img = nullptr;
POINT render_position = {0};
在shape中已经定义坐标了,为什么还要再单独去记录渲染位置呢
这是因为图片是有厚度的,碰撞体一般位于图片中央偏上一点。另一方面,这也与“数据逻辑和渲染分离”的设计模式相契合。
然后,我们就可以通过下面这行代码来进行渲染
putimage_alpha(camera, render_position.x, render_position.y, img);
2.2 平台列表
来到main.cpp中,再全局变量中添加vector类型的平台列表
std::vector<Platform> platform_list;
在GameScene中引入这个变量
extern std::vector<Platform> platform_list;
接下来就要在on_enter对它进行初始化了,包括一个大平台和三个小平台。
初始化时我们让实际的碰撞位置略小于图片尺寸,这样在游戏表现中更加自然
platform_list.resize(4);
Platform &large_platform = platform_list[0];
large_platform.img = &img_platform_large;
large_platform.render_position.x = 122;
large_platform.render_position.y = 455;
large_platform.shape.left = (float)large_platform.render_position.x + 30;
large_platform.shape.right = (float)large_platform.render_position.x + img_platform_large.getwidth() - 30;
large_platform.shape.y = (float)large_platform.render_position.y + 60;

// 初始化第一个小平台
Platform& small_platform_1 = platform_list[1];
small_platform_1.img = &img_platform_small;
small_platform_1.render_positon.x = 175;
small_platform_1.render_positon.y = 360;
small_platform_1.shape.left = (float)small_platform_1.render_positon.x + 40;
small_platform_1.shape.right = (float)small_platform_1.render_positon.x + img_platform_small.getwidth() - 40;
small_platform_1.shape.y = (float)small_platform_1.render_positon.y + img_platform_small.getheight() / 2;

// 初始化第二个小平台
Platform& small_platform_2 = platform_list[2];
small_platform_2.img = &img_platform_small;
small_platform_2.render_positon.x = 855;
small_platform_2.render_positon.y = 360;
small_platform_2.shape.left = (float)small_platform_2.render_positon.x + 40;
small_platform_2.shape.right = (float)small_platform_2.render_positon.x + img_platform_small.getwidth() - 40;
small_platform_2.shape.y = (float)small_platform_2.render_positon.y + img_platform_small.getheight() / 2;

// 初始化第三个小平台
Platform& small_platform_3 = platform_list[3];
small_platform_3.img = &img_platform_small;
small_platform_3.render_positon.x = 515;
small_platform_3.render_positon.y = 225;
small_platform_3.shape.left = (float)small_platform_3.render_positon.x + 40;
small_platform_3.shape.right = (float)small_platform_3.render_positon.x + img_platform_small.getwidth() - 40;
small_platform_3.shape.y = (float)small_platform_3.render_positon.y + img_platform_small.getheight() / 2;
之后再GameScene::on_draw()中,遍历所有的平台对象,依次调用它们的on_draw()方法
for(const Platform& platform : platform_list) {
    platform.on_draw(camera);
}
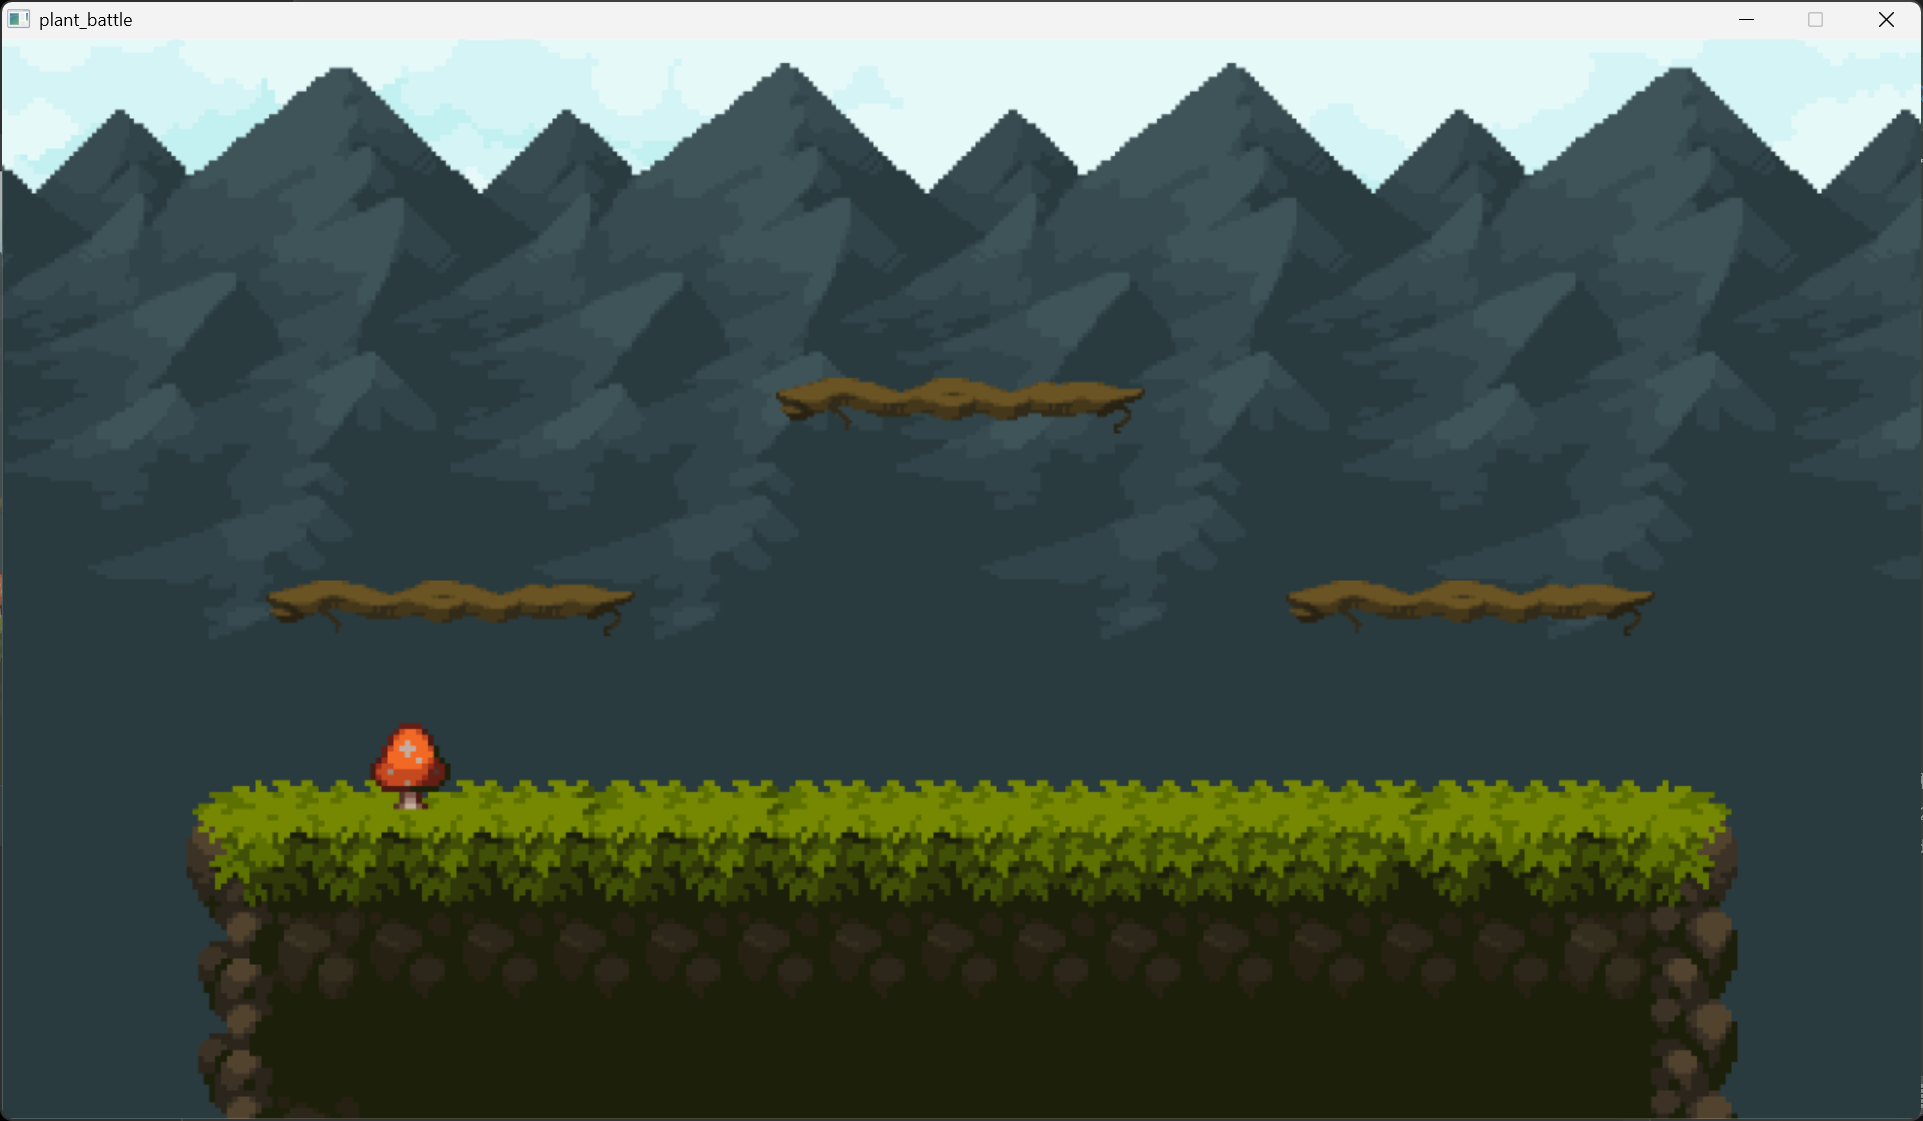
之后运行程序我们可以看到三小一大几个平台都能正常渲染了
2.3 调试模式
如果我们希望对平台的碰撞外形进行检查,该如何处理呢?
这里我们开始实现一个简单的调试模式,让开发者能对这些抽象的物理碰撞数据进行可视化的检查
我们现在main.cpp中定义一个全局的布尔变量,标记是否打开调试模式
bool is_debug = false;
之后在Platform中用extern引入
extern bool is_debug;
在Platform::on_draw()中,我们就可以根据当前是否开启了调试状态,选择是否渲染额外的碰撞线。不过在此之前,我们需要封装一个考虑摄像机的碰撞体渲染函数
inline void line(const Camera& camera, int x1, int y1, int x2, int y2)
{
    const Vector2& pos_camera = camera.get_position();
    line((int)(x1 - pos_camera.x), (int)(y1 - pos_camera.y), (int)(x2 - pos_camera.x), (int)(y2 - pos_camera.y));
}
之后在Platform::on_draw()中,调用我们写的这个line函数,把水平线绘制出来
if(is_debug)
{
    setlinecolor(RGB(255, 0, 0));
    line(camera, (int)shape.left, (int)shape.y, (int)shape.right, (int)shape.y);
}
接下来,我们来到GameScene::on_input()中,添加按Q开启调试模式的功能
switch(msg.message)
{
case WM_KEYUP:
    if (msg.vkcode == 'Q')
        is_debug = !is_debug;
    break;
default:
    break;
}
并在on_draw方法中,添加调试模式开启后的提示信息
if (is_debug)
{
    settextcolor(RGB(255, 0, 0));
    outtextxy(15, 15, _T("已开启调试模式,按 'Q' 键关闭"));
}
评论
如果你已登录 GitHub,就可以直接在这里评论。