05-角色特效与像素缓冲区
1 前置知识
1.1 像素缓冲区
打开EasyX的头文件可以法线,IMAGE类有一个名为m_pBuffer的指针。
// Image class
class IMAGE
{
public:
    int getwidth() const;           // Get the width of the image
    int getheight() const;          // Get the height of the image

protected:
    int         width, height;      // Width and height of the image
    HBITMAP     m_hBmp;
    HDC         m_hMemDC;
    float       m_data[6];
    COLORREF    m_LineColor;        // Current line color
    COLORREF    m_FillColor;        // Current fill color
    COLORREF    m_TextColor;        // Current text color
    COLORREF    m_BkColor;          // Current background color
    DWORD*      m_pBuffer;          // Memory buffer of the image

    LINESTYLE   m_LineStyle;        // Current line style
    FILLSTYLE   m_FillStyle;        // Current fill style

    void        SetDefault();       // Set the graphics environment as default

public:
    IMAGE(int _width = 0, int _height = 0);
    IMAGE(const IMAGE &img);
    IMAGE& operator = (const IMAGE &img);
    virtual ~IMAGE();
    virtual void Resize(int _width, int _height);           // Resize image
};
这个变量
m_pBuffer的类型为DWORD*,实际上就是一个元素类型为DWORD的数组。这个数组就是图像的像素缓冲区。需要指出的是WORD固定是2字节,DWORD固定是4字节
EasyX提供了函数GetImageBuffer()来获取绘图设备的显示缓冲区指针。
EasyX 文档 - GetImageBuffer
DWORD* GetImageBuffer(IMAGE* pImg = NULL);
想要获取图像image的像素缓冲区,就可以使用下面这行代码
DWORD* buffer = GetImageBuffer(&image);
1.2 获取RGB分量
原本我们直接分别载入了角色向左和向右两套动画,世界上我们可以通过对像素缓冲区进行操作,直接有其中一套动画镜像生成另一套动画。
我们可以使用下面这样的代码获取到像素色彩的各分量值以及透明通道的Alpha值
DWORD pix_color = buffer[y * width + x];
BYTE a = (pix_color & 0xff000000) >> 24;
BYTE r = (pix_color & 0x00ff0000) >> 16;
BYTE g = (pix_color & 0x0000ff00) >> 8;
BYTE b = pix_color & 0x000000ff;
实际上EasyX提供了几个宏来实现这种功能。它们分别是GetGValue, GetRValue,和GetBValue。利用它们可以返回COLORREFF 类型的指定颜色分量
EasyX 文档 - GetRValue
显示缓冲区中的每个点对应 RGBTRIPLE 类型的结构体:
struct RGBTRIPLE {
    BYTE rgbtBlue;
    BYTE rgbtGreen;
    BYTE rgbtRed;
};
RGBTRIPLE 在内存中的表示形式为:0xrrggbb (bb=蓝,gg=绿,rr=红),而常用的 COLORREF 在内存中的表示形式为:0xbbggrr。注意,两者的红色和蓝色是相反的,请用 BGR 宏交换红色和蓝色。
因此,实际代码为
DWORD pix_color = buffer[y * width + x];
BYTE r = GetBValue(pix_color);
BYTE g = GetGValue(pix_color);
BYTE b = GetRValue(pix_color);
2 角色朝向修改
IMAGE img_player_right[6];

//生成玩家向右动画的图片
for (int i=0; i<6; i++)
{
    //调整向右动画图片尺寸大小
    int width = img_player_left[i].getwidth();
    int height = img_player_left[i].getheight();
    Resize(&img_player_right[i], width, height);
}
这里我们首先使用Resize函数将向右的序列帧图片调整为相同大小。这是因为定义IMAGE对象,如果没有使用其他对象进行拷贝构造,或者使用loadamage进行图片加载的话,内部像素缓冲区是不存在的
所以Resize过程可以理解为对IMAGE对象内存再分配的过程。
DWORD* color_buffer_left_img = GetImageBuffer(&img_player_left[i]);
DWORD* color_buffer_right_img = GetImageBuffer(&img_player_right[i]);

for(int y = 0; y < height; y++) {
    for(int x = 0; x < width; x++) {
        int idx_left_img = y*width+x;   //源像素索引
        int idx_right_img = y*width+(width-1-x);    //目标像素索引
        color_buffer_right_img[idx_right_img] = color_buffer_left_img[idx_left_img];
    }
}
3 受击闪白效果
纯白色的DWORD值可以通过下面这行代码得到
DWORD white_pix = BGR(RGB(255, 255, 255)) | (((DWORD)(BYTE)(255)) << 24 );
IMAGE img_player_left_sketch[6];

//生成玩家向左动画的剪影
for(int i = 0; i < 6; i++) {
    //调整动画图片尺寸大小
    int width = img_player_left[i].getwidth();
    int height = img_player_left[i].getheight();
    Resize(&img_playre_left_sketch[i], width, height);

    DWORD *color_buffer_raw_img = GetImageBuffer(&img_player_left[i]);
    DWORD* color_buffer_sketch_img = GetImageBuffer(&img_player_left_skech[i]);
    for(int y=0; y<height; y++) {
        for(int x=0; x<width; x++) {
            int idx = y *width +x;
            if((color_buffer_raw_img[idx]&0xFF000000)>>24) {
                color_buffer_sketch_img[idx] = BGR(RGB(255, 255, 255)) | (((DWORD)(BYTE)(255)) << 24);
            }
        }
    }

}
我通过下面这个函数来生成闪白效果对应的Atlas序列帧资源
Atlas* GetNewSketchAtlas()
{
    if (frame_list.size()==0) {
        return nullptr;
    }
    Atlas* new_atlas = new Atlas();
    int width = frame_list[0]->getwidth();
    int height = frame_list[0]->getheight();

    for (int i = 0; i<frame_list.size(); i++) {

        IMAGE *frame = new IMAGE();
        Resize(frame, width, height);
        DWORD* color_buffer_src_img = GetImageBuffer(frame_list[i]);
        DWORD* color_buffer_des_img = GetImageBuffer(frame);

        if(i%3!=0) {
            memcpy(color_buffer_des_img, color_buffer_src_img, width * height * sizeof(DWORD));
            new_atlas->frame_list.push_back(frame);
            continue;
        }
        for (int y = 0; y < height; y++) {
            for (int x = 0; x < width; x++) {
                int idx = y * width + x;
                if((color_buffer_src_img[idx]&0xFF000000)>>24) {
                    color_buffer_des_img[idx] = BGR(RGB(255, 255, 255)) | (((DWORD)(BYTE)(255)) << 24);
                }
            }
        }
        new_atlas->frame_list.push_back(frame);
    }

    return new_atlas;
}
在加载完原始序列帧之后就生成闪烁序列帧
atlas_player_left_sketch = atlas_player_left->GetNewSketchAtlas();
atlas_player_right_sketch = atlas_player_right->GetNewSketchAtlas();
在Player类中定义状态枚举类型
private:
    enum class Status
    {
        Idle = 0,
        Sketch,
        Freezed
    };
private:
    Status state;
在Player类初始化时,指定对应的闪白动画
anim_left_sketch = new Animation(atlas_player_left_sketch, 45);
anim_right_sketch = new Animation(atlas_player_right_sketch, 45);

state = Status::Idle;
在Player类的绘制方法
Draw()中,根据当前状态绘制对应对应的动画if (is_facing_left) {
switch(state)
{
case Status::Idle:
anim_left->Play(position.x, position.y, delta);
break;
case Status::Sketch:
anim_left_sketch->Play(position.x, position.y, delta);
break;
}
} else {
switch(state)
{
case Status::Idle:
anim_right->Play(position.x, position.y, delta);
break;
case Status::Sketch:
anim_right_sketch->Play(position.x, position.y, delta);
break;
}
}
4 冻结效果
4.1 实现原理
我们之前使用AlphaBlend函数实现了根据透明通道混合图片。
我们先看一下当透明度存在时的色彩计算公式
为了更简明地表示,公式中的Alhpa值取值范围不再是0~255的整型,而是0~1的浮点值。
我们像实现冰冻特效,就可以将一张冰冻图片贴附在玩家的序列帧之上。
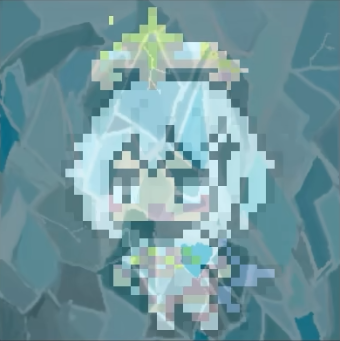
我们首先拷贝当前帧的动画图片对象
// 拷贝当前帧用于后续处理
IMAGE img_current_frame(img_player_left[counter]);
int width = img_current_frame.getwidth();
int height = img_current_frame.getheight();
获取冰冻图片和当前帧图片的渲染缓冲区
DWORD* color_buffer_ice_img = GetImageBuffer(&img_ice);
DWORD* color_buffer_frame_img = GetImageBuffer(&img_current_frame);
for(int y=0; y<height; y++)
{
    for(int x=0; x<width; x++)
    {
        int idx = y* width + x;
        static const float RADIO = 0.25f;
        DWORD color_ice_img = color_buffer_ice_img[idx];
        DWORD color_frame_img = color_buffer_frame_img[idx];
        if((color_frame_img & 0xFF000000) >> 24) {
            //注意,由于颜色缓冲中的颜色为BGR顺序,所以需要交换R和B的位置
            BYTE r = (BYTE)(GetBValue(color_frame_img) * RADIO + GetBValue(color_ice_img) * (1-RADIO));
            BYTE g = (BYTE)(GetGValue(color_frame_img) * RADIO + GetGValue(color_ice_img) * (1-RADIO));
            BYTE b = (BYTE)(GetRValue(color_frame_img) * RADIO + GetRValue(color_ice_img) * (1-RADIO));
            color_buffer_frame_img[idx] = BGR(RGB(r, g, b)) | (((DWORD)(BYTE)(255)) << 24);
        }
    }
}
为了让效果更加灵动,我们可以为冰锥添加高光。
结合现实情况考虑,冰锥的高光一般是因为某些冰面的反射方向恰好处于观察者视角处导致的。也就是说结晶贴图中较量的部分。
所以我们可以提取冰晶贴图中亮度大于阈值的部分,在这些部分显示不断变化的亮色条带,这样整体的效果会自然很多。
4.2 实现代码
完整的冻结效果代码如下
void RenderFrozenPlayer(int x, int y, int delta)
{
    static int frozen_timer = 0; //冰冻状态计时器
    static const int THICKNESS = 5; //扫描线宽度
    static int highlight_pos_y = 0; //扫描线竖直坐标

    // 更新冻结状态计时器并重置扫描线位置
    if ((++frozen_timer % 100) == 0)
    {
        highlight_pos_y = -THICKNESS;
    }

    //绘制玩家脚底阴影
    // putimage_alpha(position.x + (80 - 32) / 2, position.y + 80, &img_shadow);

    //根据当前是否处于冻结状态渲染不同的动画帧

    // 拷贝当前帧用于后续处理
    IMAGE img_current_frame(*(anim_atlas->frame_list[idx_frame]));
    int width = img_current_frame.getwidth();
    int height = img_current_frame.getheight();

    // 更新高亮扫描线竖直坐标
    highlight_pos_y = (highlight_pos_y + 2) % height;

    //遍历当前帧的色彩缓冲区,将不透明区域进行混叠
    DWORD* color_buffer_ice_img = GetImageBuffer(&img_ice);
    DWORD* color_buffer_frame_img = GetImageBuffer(&img_current_frame);
    for(int y=0; y<height; y++)
    {
        for(int x=0; x<width; x++)
        {
            int idx = y* width + x;
            static const float RADIO = 0.25f;   //混叠比例
            static const float THRESHOLD = 0.84f;   //高亮阈值
            DWORD color_ice_img = color_buffer_ice_img[idx];
            DWORD color_frame_img = color_buffer_frame_img[idx];
            if((color_frame_img & 0xFF000000) >> 24) {
                //注意,由于颜色缓冲中的颜色为BGR顺序,所以需要交换R和B的位置
                BYTE r = (BYTE)(GetBValue(color_frame_img) * RADIO + GetBValue(color_ice_img) * (1-RADIO));
                BYTE g = (BYTE)(GetGValue(color_frame_img) * RADIO + GetGValue(color_ice_img) * (1-RADIO));
                BYTE b = (BYTE)(GetRValue(color_frame_img) * RADIO + GetRValue(color_ice_img) * (1-RADIO));
                //如果搞来给你扫描线处的像素亮度大于阈值,则直接将该像素设置为纯白色
                if ((y >= highlight_pos_y && y <= highlight_pos_y + THICKNESS)
                    && ((r / 255.0f) * 0.2126f + (g / 255.0f) * 0.7152f + (b / 255.f) * 0.0702f) >= THRESHOLD)
                {
                    color_buffer_frame_img[idx] = BGR(RGB(255, 255, 255)) | (((DWORD)(BYTE)(255)) << 24);
                    continue;
                }
                color_buffer_frame_img[idx] = BGR(RGB(r, g, b)) | (((DWORD)(BYTE)(255)) << 24);
            }
        }
    }
    putimage_alpha(x, y, &img_current_frame);
}
这个函数
RenderFrozenPlayer()被作为Animation类的一个方法,仅仅负责冰冻角色的渲染,不负责冰冻效果开始和结束的控制。
在Player类的Draw方法,如果state==Status::Frozen则调用RenderFrozenPlayer(),绘制冰冻中的角色
if (is_facing_left) {
    switch(state)
    {
    case Status::Idle:
        anim_left->Play(position.x, position.y, delta);
        break;
    case Status::Sketch:
        anim_left_sketch->Play(position.x, position.y, delta);
        break;
    case Status::Frozen:
        anim_left->RenderFrozenPlayer(position.x, position.y, delta);
        break;
    }

} else {
    switch(state)
    {
    case Status::Idle:
        anim_right->Play(position.x, position.y, delta);
        break;
    case Status::Sketch:
        anim_right_sketch->Play(position.x, position.y, delta);
        break;
    case Status::Frozen:
        anim_right->RenderFrozenPlayer(position.x, position.y, delta);
        break;
    }
}
然后在
Player::ProcessEvent()中增加对输入W键的处理,通过W键来查看或取消冰冻效果switch (msg.vkcode) {
......
case 'W':
if(state == Status::Idle) {
state = Status::Frozen;
} else if(state == Status::Frozen) {
state = Status::Idle;
}
break;
}
最后,我在main函数渲染画面的部分用
drawtext()函数来绘制提示文字。drawtext()的用法请看EasyX 文档 - drawtextRECT r = {10, 30, 500, 500};
drawtext(_T("按Q查看或取消闪白特效\n按W查看或取消冰冻特效\n按Esc退出游戏"), &r, DT_WORDBREAK);
5 总结与反思
本节我实现了角色朝向的自动生成、闪白效果和冰冻效果。
“角色朝向的自动生成”依赖的是Atlas::GetNewHorizontalReversedAtlas(),它可以利用某一个Atlas对象,生成一个新的和它水平对称的Atals对象。选择这种实现方法是因为,由于角色运动的需要,水平翻转的动画非常常用,因此我们直接在资源加载阶段就生成整套的镜像动画,减轻素材准备的工作量,同时不给实际渲染增加负担。
“冰冻效果”依赖的是Animation::RenderFrozenPlayer(),为什么把它放在Animation类而不是Atlas类实现呢?
这是因为前面“角色朝向的自动生成”可以看作资源的自动生成,而不是特效,因为比较常用所以我们不让它根据当前画面生出,而在最开始就直接生成出来整套动画。
而“冰冻效果”则依赖当前帧的画面,更具有实时性,更适合作为画面合成的特效而非提前单独生成的动画。
另外,这个方法只负责冰冻效果的渲染而不负责它的控制。这样做到了功能的解耦,防止代码变得臃肿。
“闪白效果”依赖的是Atlas::GetNewSketchAtlas(),和前面“角色朝向的自动生成”类似,也是提前生成一套动画。实际上它更适合采取类似于“冰冻效果”的实现方式,不过在一开始我没有考虑到这一点,为了图省事就在Atlas类中实现了。
评论
如果你已登录 GitHub,就可以直接在这里评论。